Finance Module
The Finance module is a personal and team cash flow management tool. It tracks income and expenses, categorizes transactions, enforces budget limits, and analyzes savings.
Tip: Quickly navigate to Finance by selecting Finance in the ribbon or sidebar menu.
1. Module Interface
Section titled “1. Module Interface”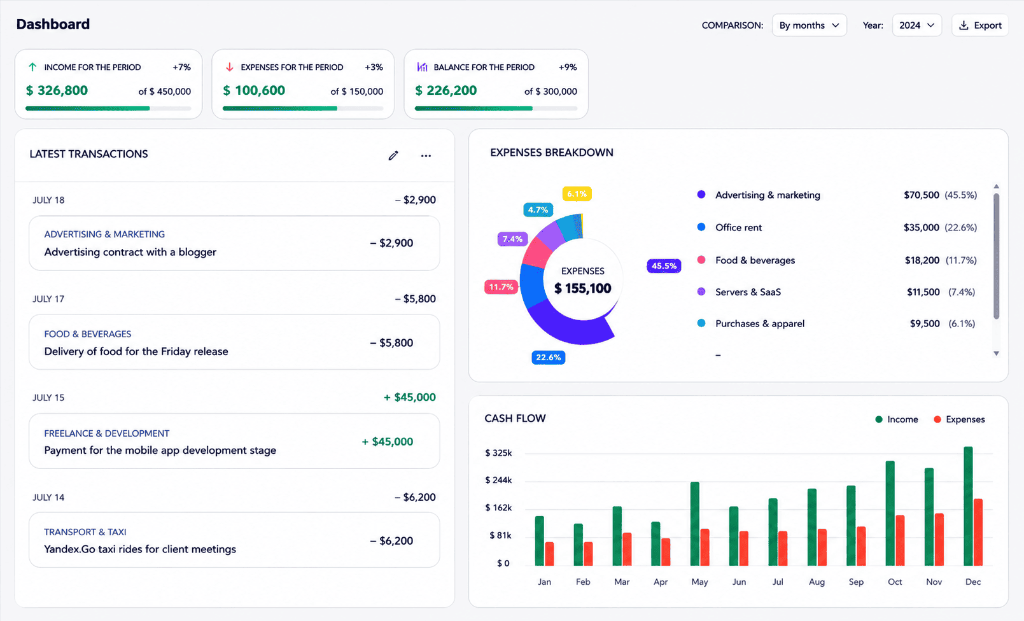
The summary dashboard provides a clear overview of your financial status for any selected timeframe:
- Period Switcher: Interval selection buttons (Today, Week, Month, Year).
- Action Buttons:
- ”+ Add Transaction” — Quick entry for income or expense.
- “Create Category” — Add a new income or expense category.
- “Create Budget” — Set spending limits for categories.
- Balance Cards:
- Current Balance: Net overall financial balance.
- Income: Total period revenue highlighted in green (e.g.,
+$3,250). - Expenses: Total period spending highlighted in red (e.g.,
-$2,330). - Saved from Income: Percentage and total amount saved during the period (e.g.,
28%,$917).
- Category Budgets Block:
- Sorting: Group by criteria (Default, Name, % Spent, Remaining).
- Budget Indicators: Visual category cards (e.g., Cloud Hosting, Marketing, Groceries) showing progress bars, remaining balance, and cycle (Monthly, Yearly).
2. Financial Transactions
Section titled “2. Financial Transactions”
Every financial transaction records funds movement in the system:
- Click the ”+ Add Transaction” button in the top toolbar.
- In the modal form, enter amount, select type (Income or Expense), attach category, and pick date.
- Add optional text note and tags for fast filtering.
- Recurring Transactions: Optionally enable auto-repeat for regular subscriptions, rent, or payroll.
- Click Save — transaction reflects on dashboard and instantly updates balance.
3. Income and Expense Categories
Section titled “3. Income and Expense Categories”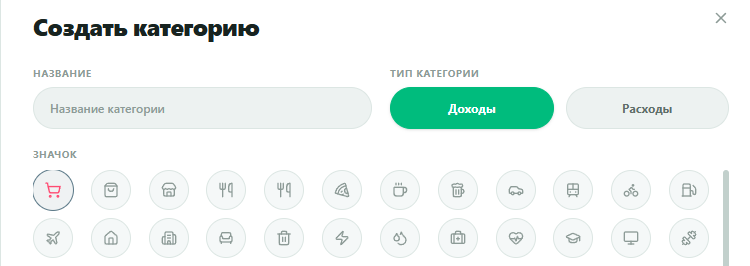
All transactions link to categories for precise breakdown analysis:
- Create Category: Click “Create Category” in the top toolbar.
- Parameters:
- Name: Enter category title (e.g., Marketing & Ads, Groceries, Hosting).
- Type: Select Income (green tab) or Expense.
- Icon: Choose a visual icon from the gallery.
4. Setting Budgets and Limits
Section titled “4. Setting Budgets and Limits”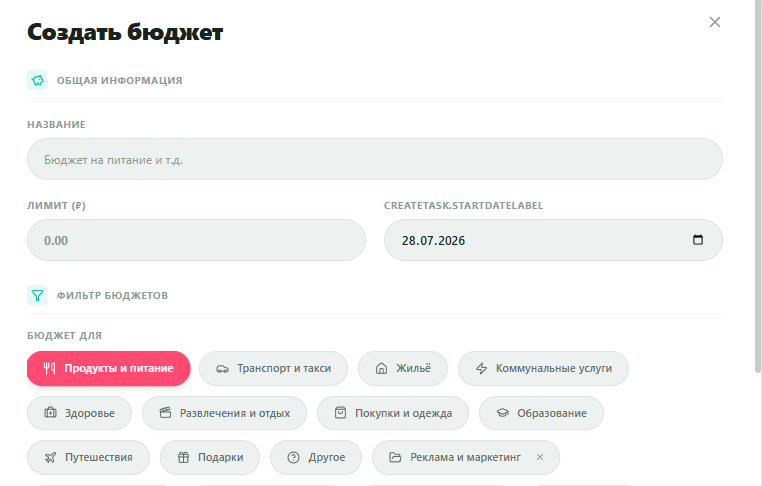
Setting budget limits helps control spending and alerts you to overruns:
- Click “Create Budget” in the top toolbar.
- General Info:
- Name: Enter budget title (e.g., Groceries Budget, Marketing).
- Limit: Set maximum spending threshold amount.
- Start Date: Set cycle start date in the calendar.
- Budget Scope:
- Budget For: Pick the expense category to limit (e.g., Groceries, Transport, Marketing).
- After saving, a budget progress card displays on dashboard with visual progress bar and percentage.
5. Analytics & Insights
Section titled “5. Analytics & Insights”
The Analytics Center provides smart financial analysis, spending trends, and budget compliance:
- Period Expenses: Displays total spending and percentage change compared to previous period (e.g.,
$2,330). - Month Forecast: Automated end-of-month spending forecast with plan completion bar (e.g.,
$2,580). - Spending Dynamics: Calculates spending change percentage and average daily burn rate (e.g.,
$83/day). - Net Balance: Margin balance (income minus expenses) tracking savings accumulation.
Financial summaries can also be requested via text using the AI Assistant.
6. Local Storage and Sync
Section titled “6. Local Storage and Sync”- All financial logs and budgets save locally in the browser (IndexedDB) and remain accessible offline.
- Cloud sync occurs automatically upon internet connection.